Step One: Create the EMU Server Service Account
Create an Active Directory User account for EMU Server components to use.
- This account will be granted necessary access into ConfigMgr
- You will need to make sure this account has access to modify workstations, create/Modify/Delete AD Groups and their memberships (only for the OUs specified in the Configuration File you will create as part of this process later on).
Step Two: Set up a Database for EMU server to use
- Install SQL Server
- Remember that volumes storing SQL data and logs should be dedicated volumes, formatted with a 64k block size.
- Remember to modify the TempDB to utilize multiple files (one per physical CPU core), with each file on a separate dedicated volume for TempDB usage (if possible). File sizes should auto-grow by an appropriate amount (not a %), and the database log file should be set to a different volume than the TempDB volumes, and it's size should be capped.
- Create a new database for EMU
- Use the name "EMU_<ConfigMgr Site Code>" - if your ConfigMgr site code is FOO, your EMU database name will be "EMU_FOO"
- If you have a CAS heirarchy, you may use CAS as your site code - but consider moving to a single-primary environment!
- Remember to modify the database to utilize multiple files (one per physical CPU core). File sizes should auto-grow by an appropriate amount (not a %), and the database log file should be set to a different volume than the data volume, and it's size should be capped.
- Use the name "EMU_<ConfigMgr Site Code>" - if your ConfigMgr site code is FOO, your EMU database name will be "EMU_FOO"
Step Three: Install the EMU Server Installer
The Server installer will create the base installation directory of your EMU Server, and build out and set up other components from there.
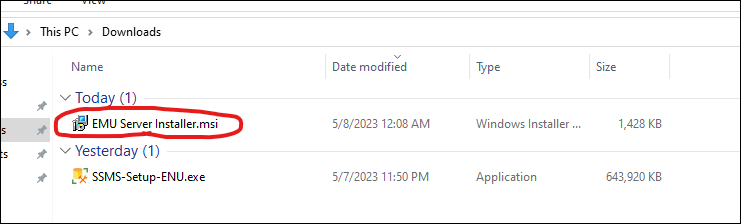
- Download the MSI file from Here
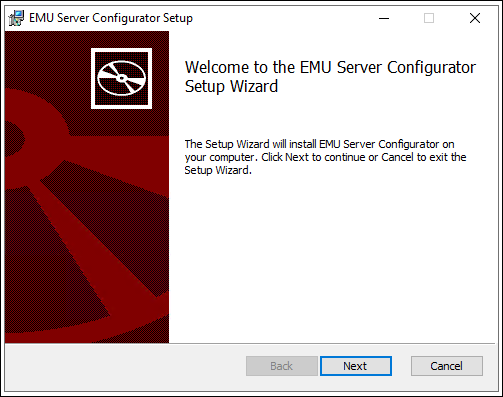
- Run the MSI, click next on the first screen
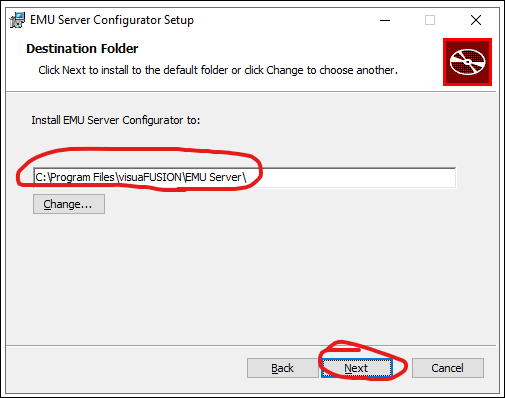
- Select your installation location
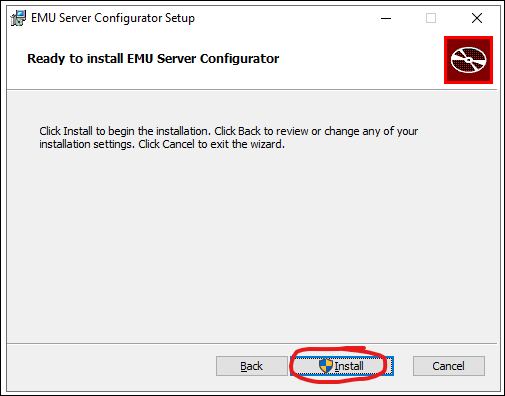
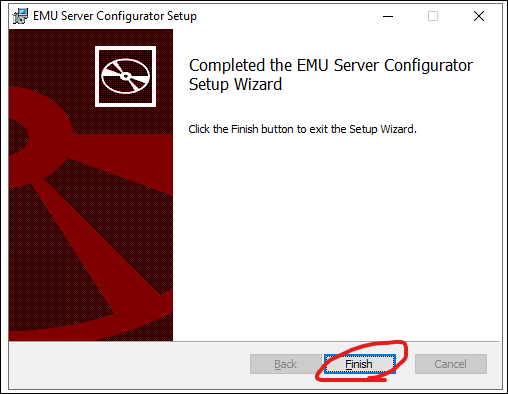
- Click Install to install the Server Installer.
- Click Finish when the process has completed.
Step Four: Run the EMU Server Installer
- Browse to the directory you installed the server installer into:

- Launch the installer as someone with administrative privileges in the following contexts:
- The server OS you are installing EMU on
- In your Configuration Manager site
- Has rights to create AD User accounts*
- This is not necessary if the account already exists
- Has rights to create/modify/grant database permissions on the ConfigMgr database
- Has rights to create/modify/grant database permissions on the new EMU database
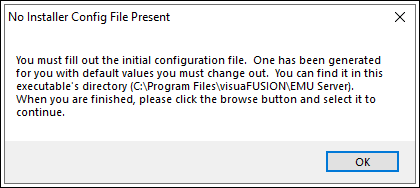
- You will see the following message the first time you run the server installer. This is normal - we will need to fill out the generated config file in the next step. Click "Ok" here.
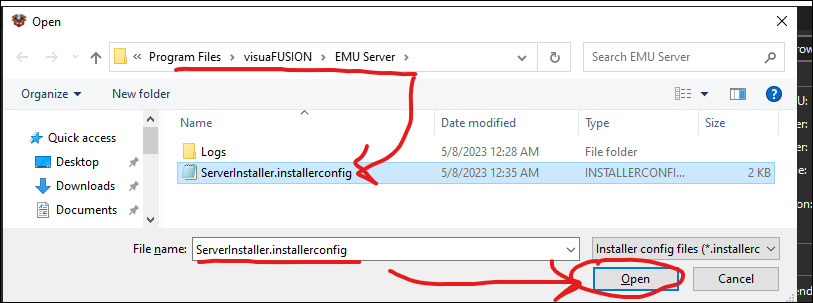
- Browse the directory mentioned above, and locate the config file. Fill it out with the appropriate values for your environment.
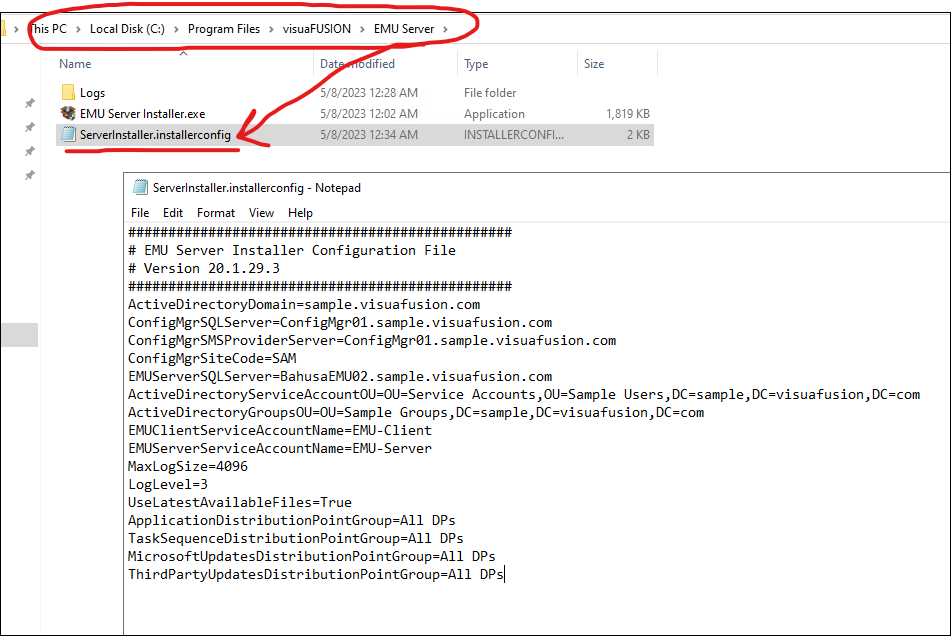
Note: There is a GUI wizard planned in the future for this piece. For now you will need to fill the config file template out manually- ActiveDirectoryDomain - the fqdn of your Active Directory Domain
- ConfigMgrSqlServer - the FQDN of your ConfigMgr SQL Server
- ConfigMgrSMSProviderServer - the FQDN of the server running your ConfigMgr SMS provider
- ConfigMgrSiteCode - The 3 digit site code of your ConfigMgr site (You can use CAS here in a CAS environment)
- EMUServerSQLServer - FQDN of the EMU SQL server you set up earlier
- ActiveDirectoryServiceAccountOU - the OU your EMU Server Service Account lives in
- ActiveDirectoryGroupsOU - The OU you'd like EMU to build out and manage tracking groups linked to application deployments within
- ADLocationLockedRootDistinguishedName - The OU you want to lock as the top-level OU EMU users can move computers around within.
- EMUClientServiceAccountName - This is not currently used, set it to what you like for now, or the same as the EMU Server Service Account.
- EMUServerServiceAccountName - The name of the account on the domain the EMU server will run under. Account name only - Do not include the domain name.
- UseLatestAvailableFiles - True/False, Causes the installer to download the latest available resource files and component installers before running (recommended).
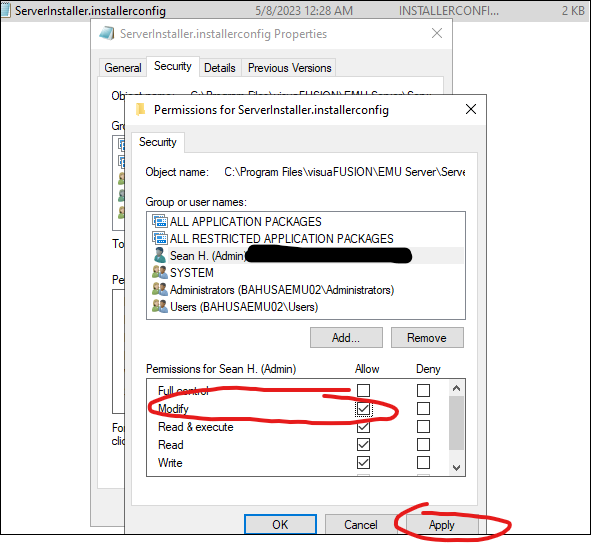
- Note that you may need to modify permissions on this file to be able to save it in its current location. You can alternatively save it to the desktop, then copy it over the existing file in the server's installation directory, which should cause UAC to prompt you for elevation to overwrite the file.
- After you have saved the file, browse to it using the browse button on the Server Configurator (it should still be open from before. If not, open it back up, and continue from step 7)

- The file should be in the same location as server installer executable
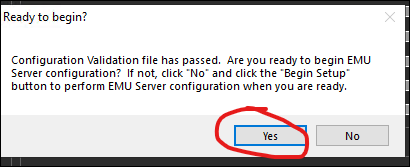
- If your configuration file is valid, you will receive the following message. Click "Yes" to continue.
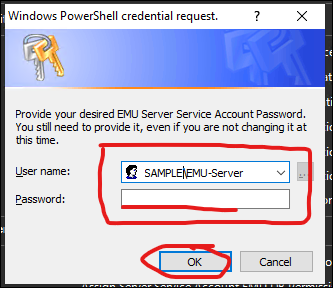
- Provide your EMU Server Service Account Credentials here:
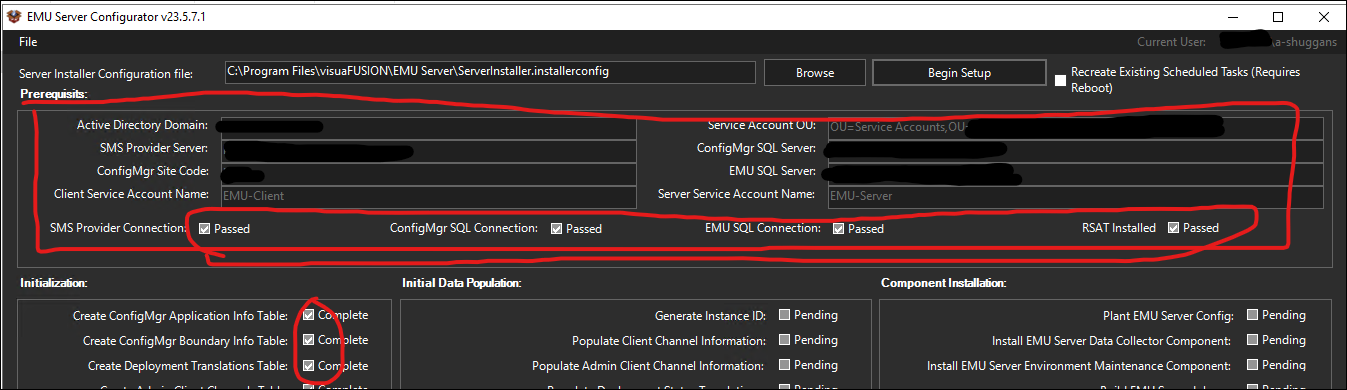
- As the server installer configures your EMU server, you can see various checkboxes begin to fill out, indicating that specific task has completed.
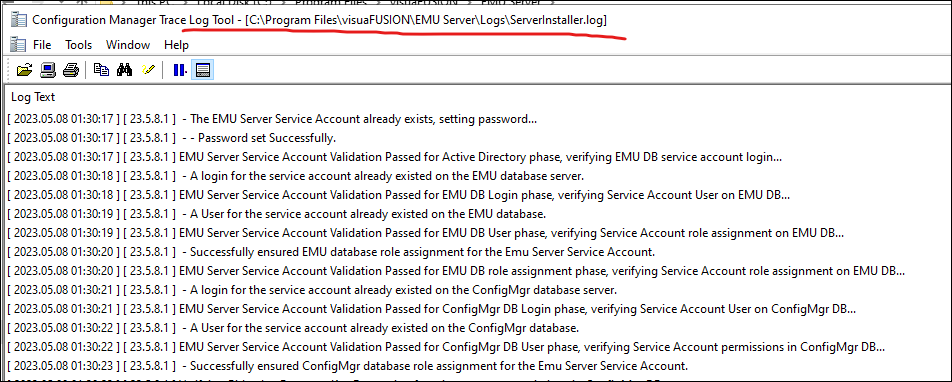
- You may also watch the ServerInstaller.log file if you want to get more details about what is occurring. Be sure to open the file with CMTrace or some similar log viewer, as text editors can cause file locks which could interfere with the installer itself being able to run correctly. You will also need to review this log for specific details and recommendations if there are any installation errors.:
- You may also watch the ServerInstaller.log file if you want to get more details about what is occurring. Be sure to open the file with CMTrace or some similar log viewer, as text editors can cause file locks which could interfere with the installer itself being able to run correctly. You will also need to review this log for specific details and recommendations if there are any installation errors.:
- When the Server Installer has completed, you will see the following message. Click Ok.
.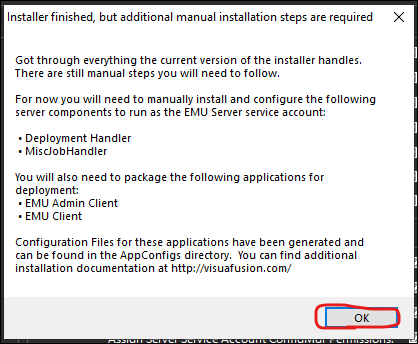
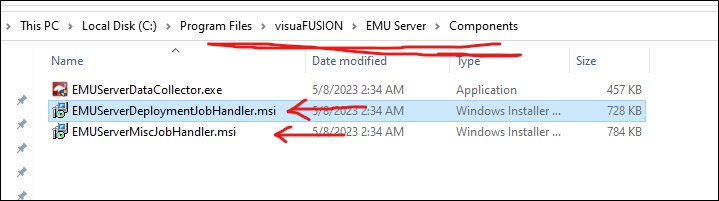
- Note: If Stated in the message, we need to install the Deployment Handler and Misc. Job Handler Components manually (the server installer handles this in current versions - however, if there are problems with those services starting and running properly, you can see the manual server service configuration documentation for further details). Navigate to your server installation's "Components" directory, and install both component's MSI's - make sure to provide the same installation path you provided the Server Installer's MSI:
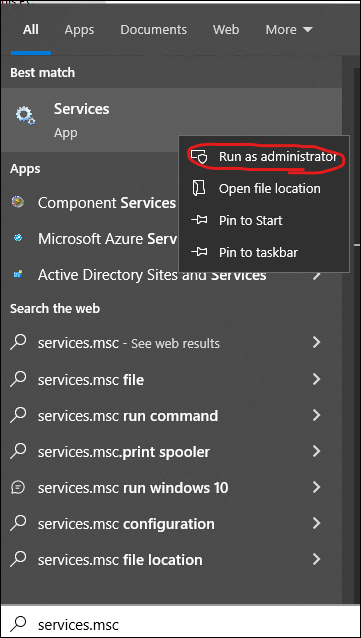
- Both of the components you just installed run as services on the system. We will need to modify the services to run delayed at startup, as well as run under the EMU Server's Service account. From your start menu, search for "Services.msc", right click it, and choose "Run as Administrator":
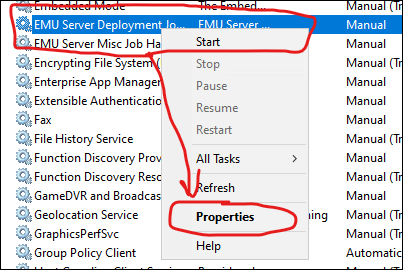
- Locate the EMU Server Deployment Job Monitor service, right click it, and select "Properties":
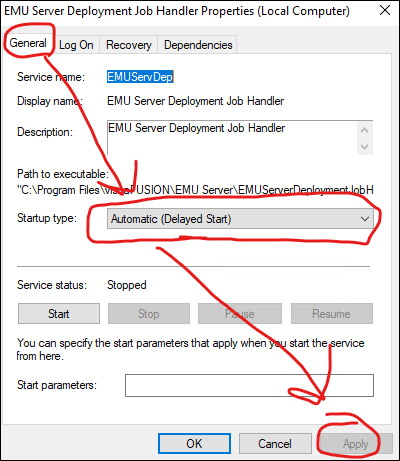
- On the "General" service tab, change the startup type to "Automatic (Delayed Start), then click Apply. Don't close the window yet.
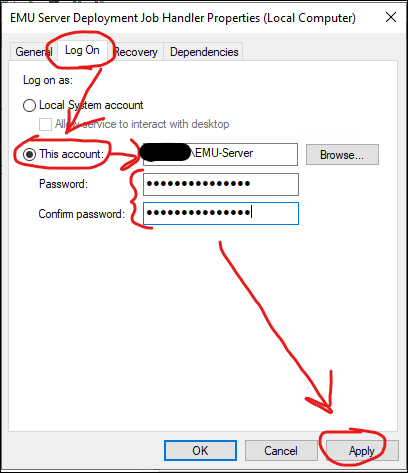
- Under the "Log On" tab, supply your EMU Server Service account credentials. Use "DOMAIN\USERNAME" format here. Click Apply, and close the window.
- Repeat the process for the EMU Server Misc Job Handler Service. Verify that both services are set to Automatic (Delayed Start), and to logon with the EMU Server Service Account.

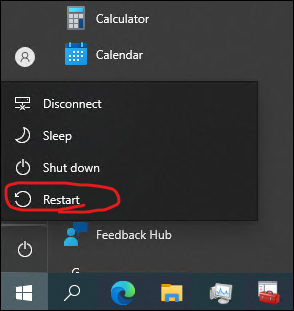
- At this point, we need to restart your server in order for the installed scheduled task schedules to begin running (they are configured to "run at startup and repeat every X minutes).
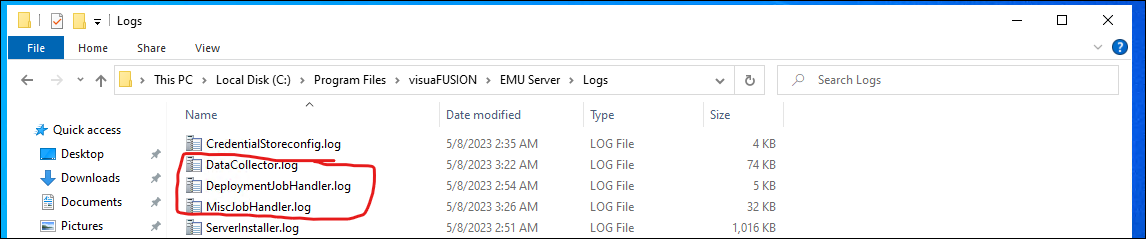
- When your server comes back online, you can validate things are running by checking the following logs:
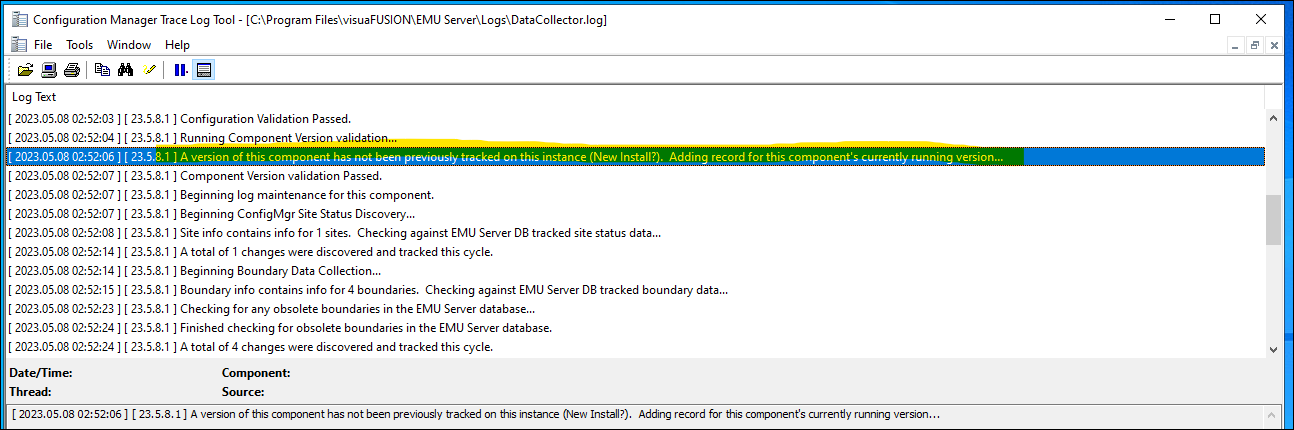
- You will notice successful Component Version Validations and tracking logged for each component, such as below:
At this point, your EMU Server is set up and ready to receive work from EMU clients. You will need to install the EMU Admin Client, which you can use to set up your EMU client configuration. Typically, your next step will be packaging up and deploying the EMU Admin client to SysAdmins, which is covered next.